Guide: Setting up my first asset policy🔗
Let’s setup your first asset policy to control computations on datasets.
To create an asset policy, you need two things:
- an active account with Owner role;
- a registered dataset.
If you want to follow along with this tutorial, feel free to download the Norfolk demo dataset from the Apheris S3 bucket: Norfolk demo dataset and Norfolk Dummy Data. Then, upload the dataset into the environment of your Compute Gateway and register it.
In the following, you will
- Name and describe the asset policy;
- Select the dataset the asset policy should govern;
- Define beneficiaries;
- Select a model from the Model Registry;
- Specify permissions the model has to comply with.
Within the asset policy creation process, you can also sign an asset policy as an additional security measurement. This guide won’t cover this. Please see signing Asset Policies for details.
Adding basic information🔗
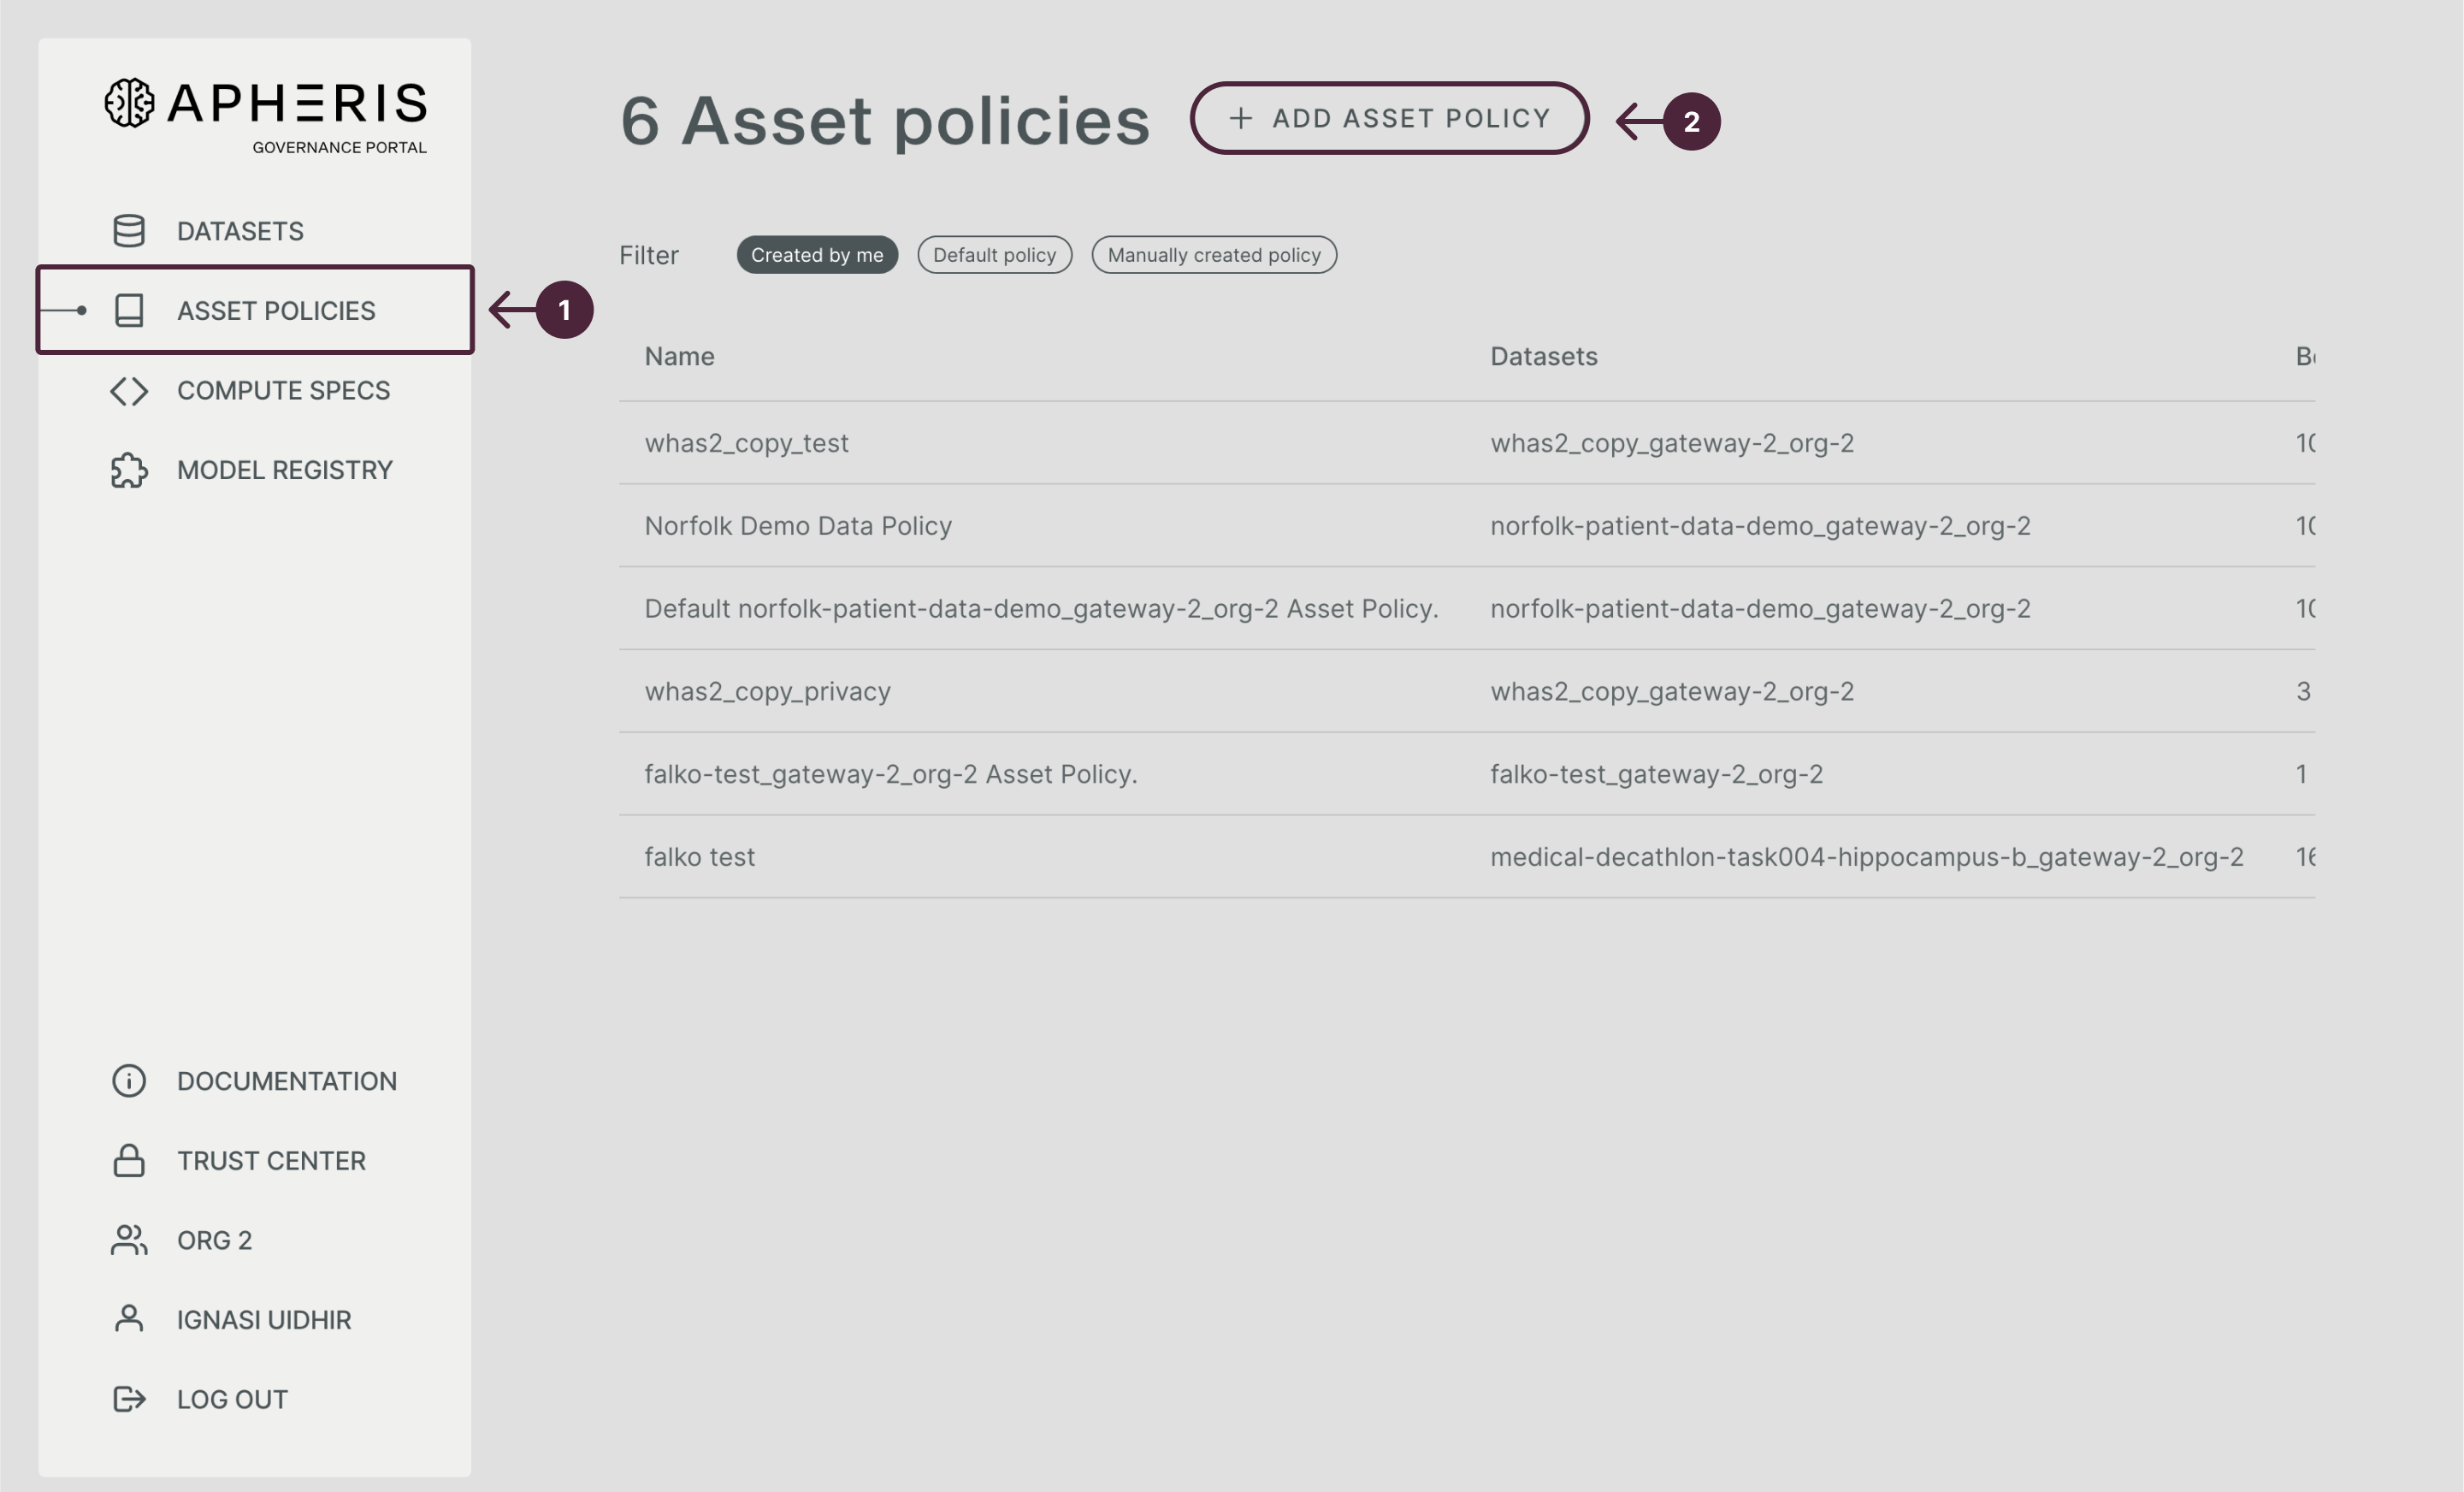
Open the Governance Portal and navigate to the “Asset Policies” tab on the left, click on “Add Asset Policy” on top.
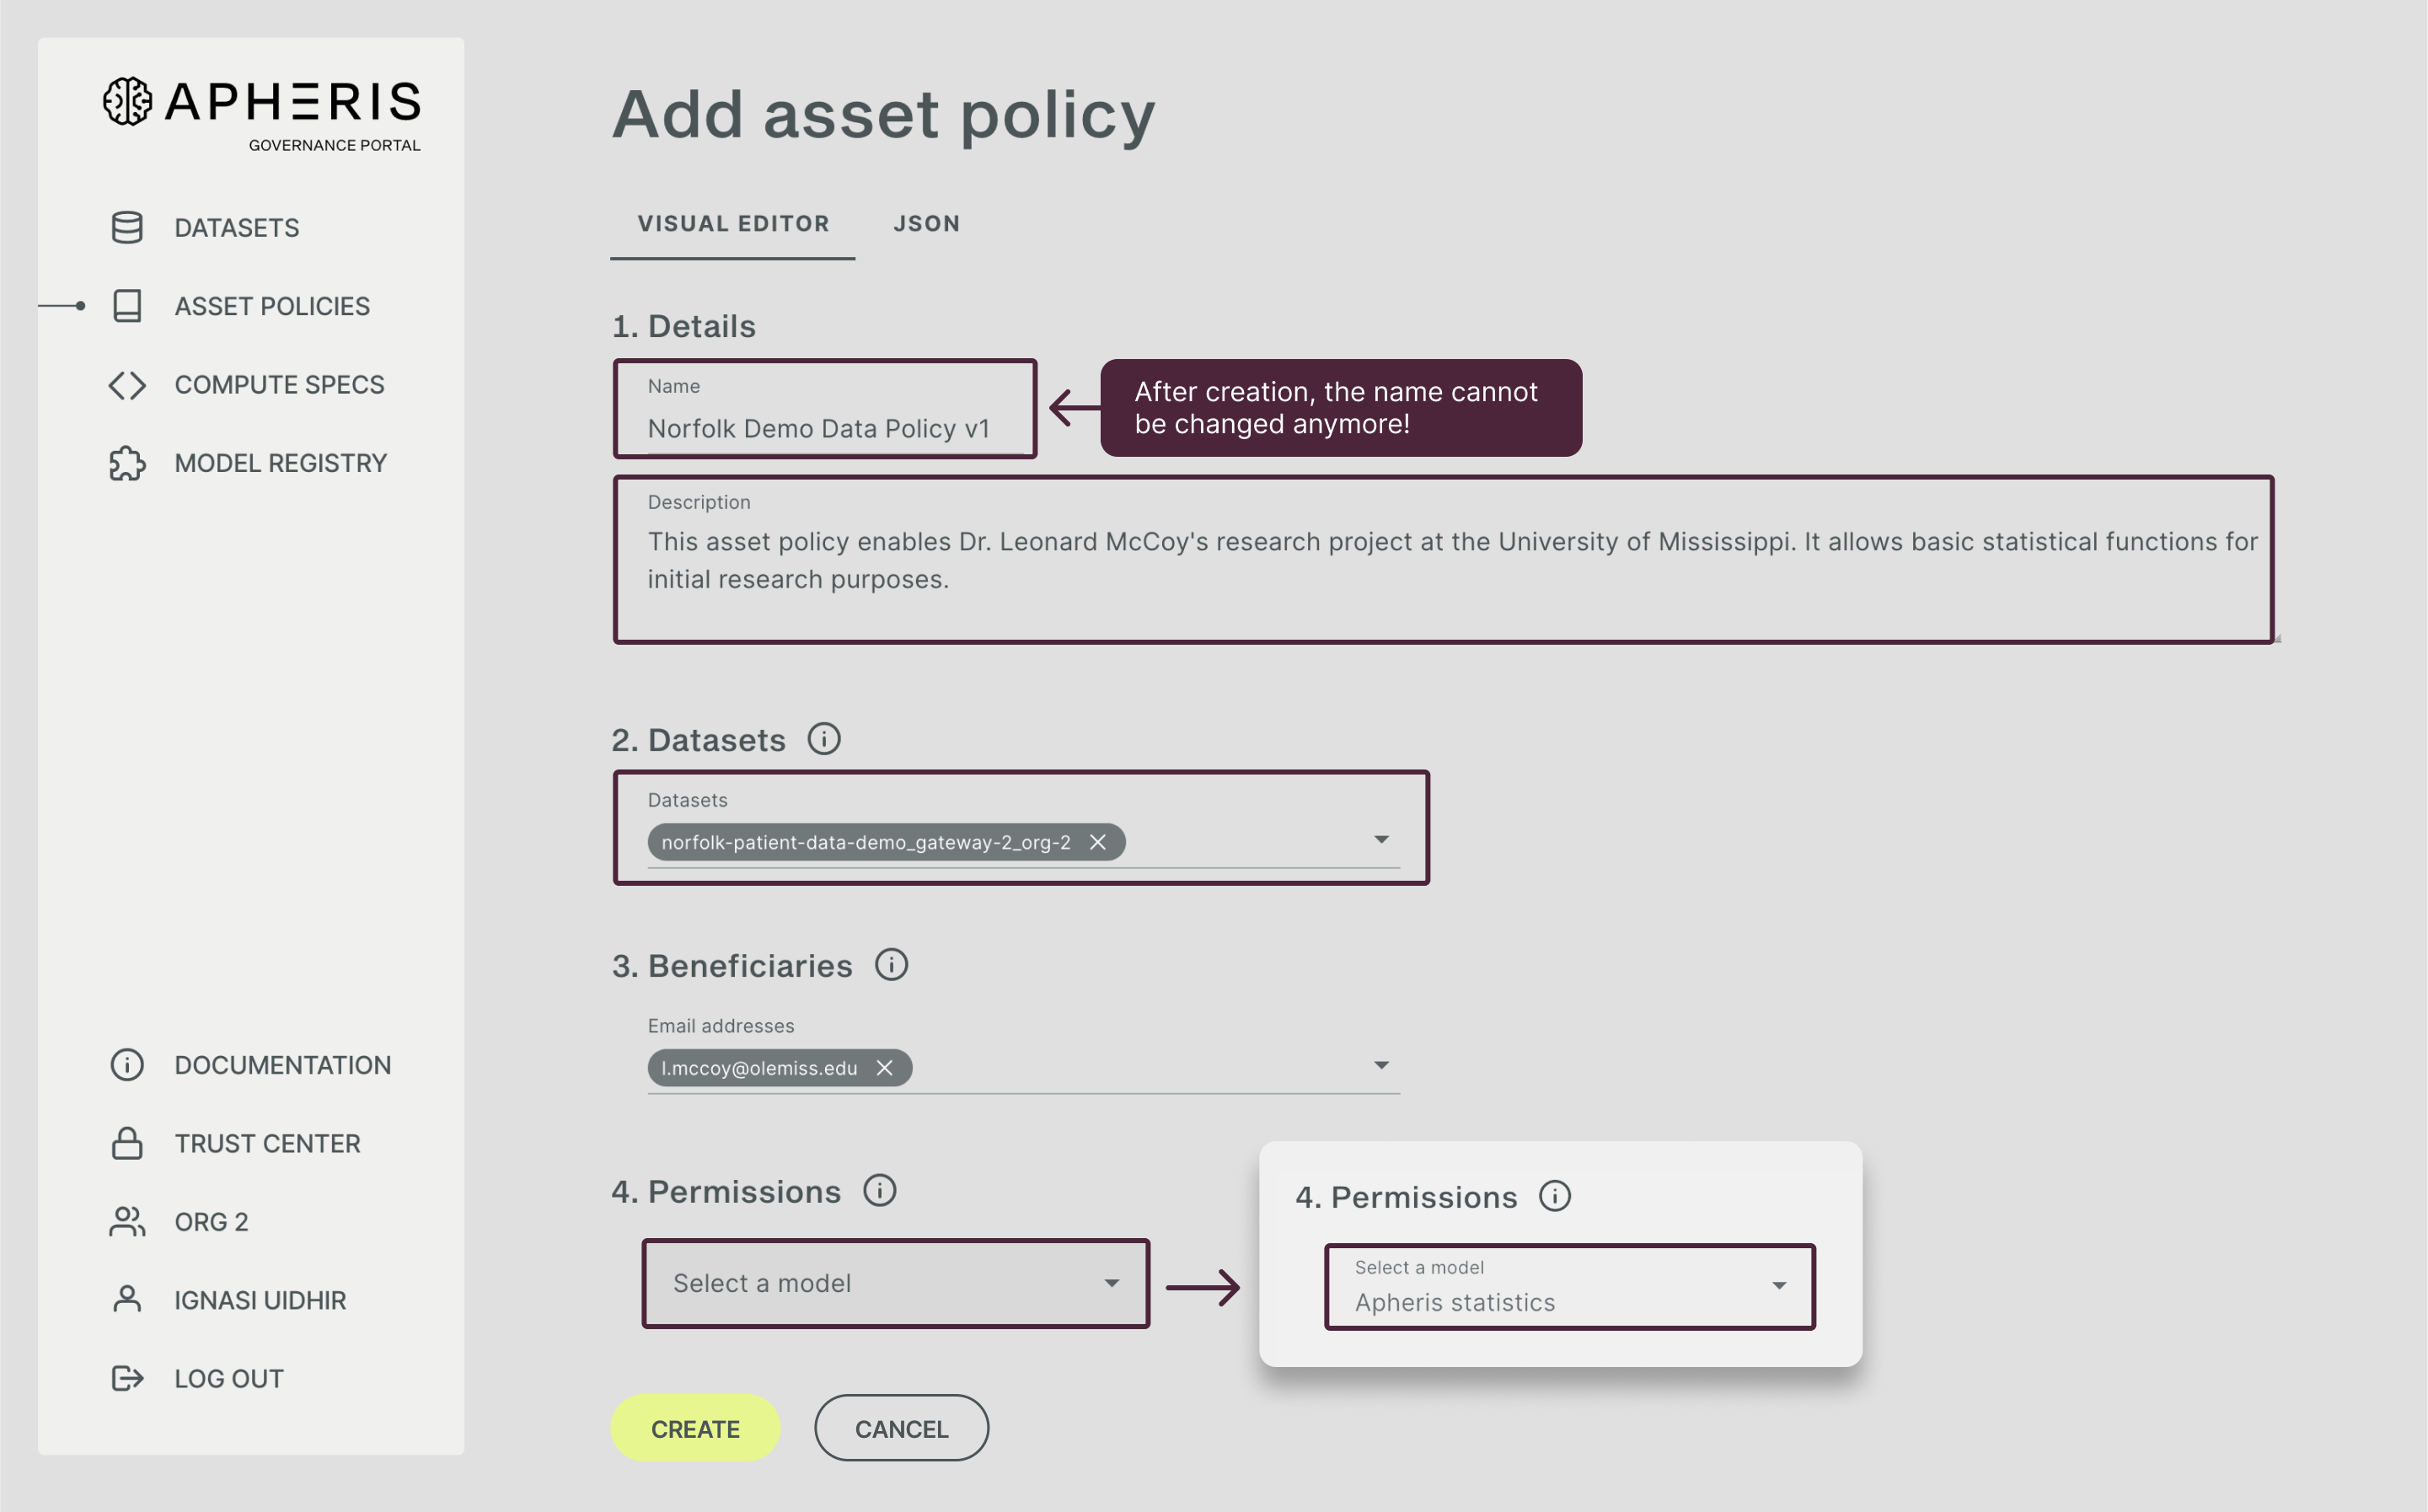
The basic information needed are:
- A name for the asset policy;
- A description of the policy;
- Which dataset the asset policy should govern (select a dataset via the drop-down);
- For whom - defined by beneficiaries email address.
Please note that the name of an asset policy cannot be further modified after the asset policy has been created.
Configuring permissions & controls🔗
In this example, the beneficiary wants to perform statistical analysis on the data. Therefore, you select “Apheris Statistics” from the drop-down.
After selecting Apheris Statistics as our model of choice, you will see the model specific configuration options below:
- Version control;
- Allowed statistical functions;
- Privacy Controls (note these are specific to the Apheris Stats model).
Because you want to profit from the newest versions of the Apheris Statistics Model, you select “all versions”.
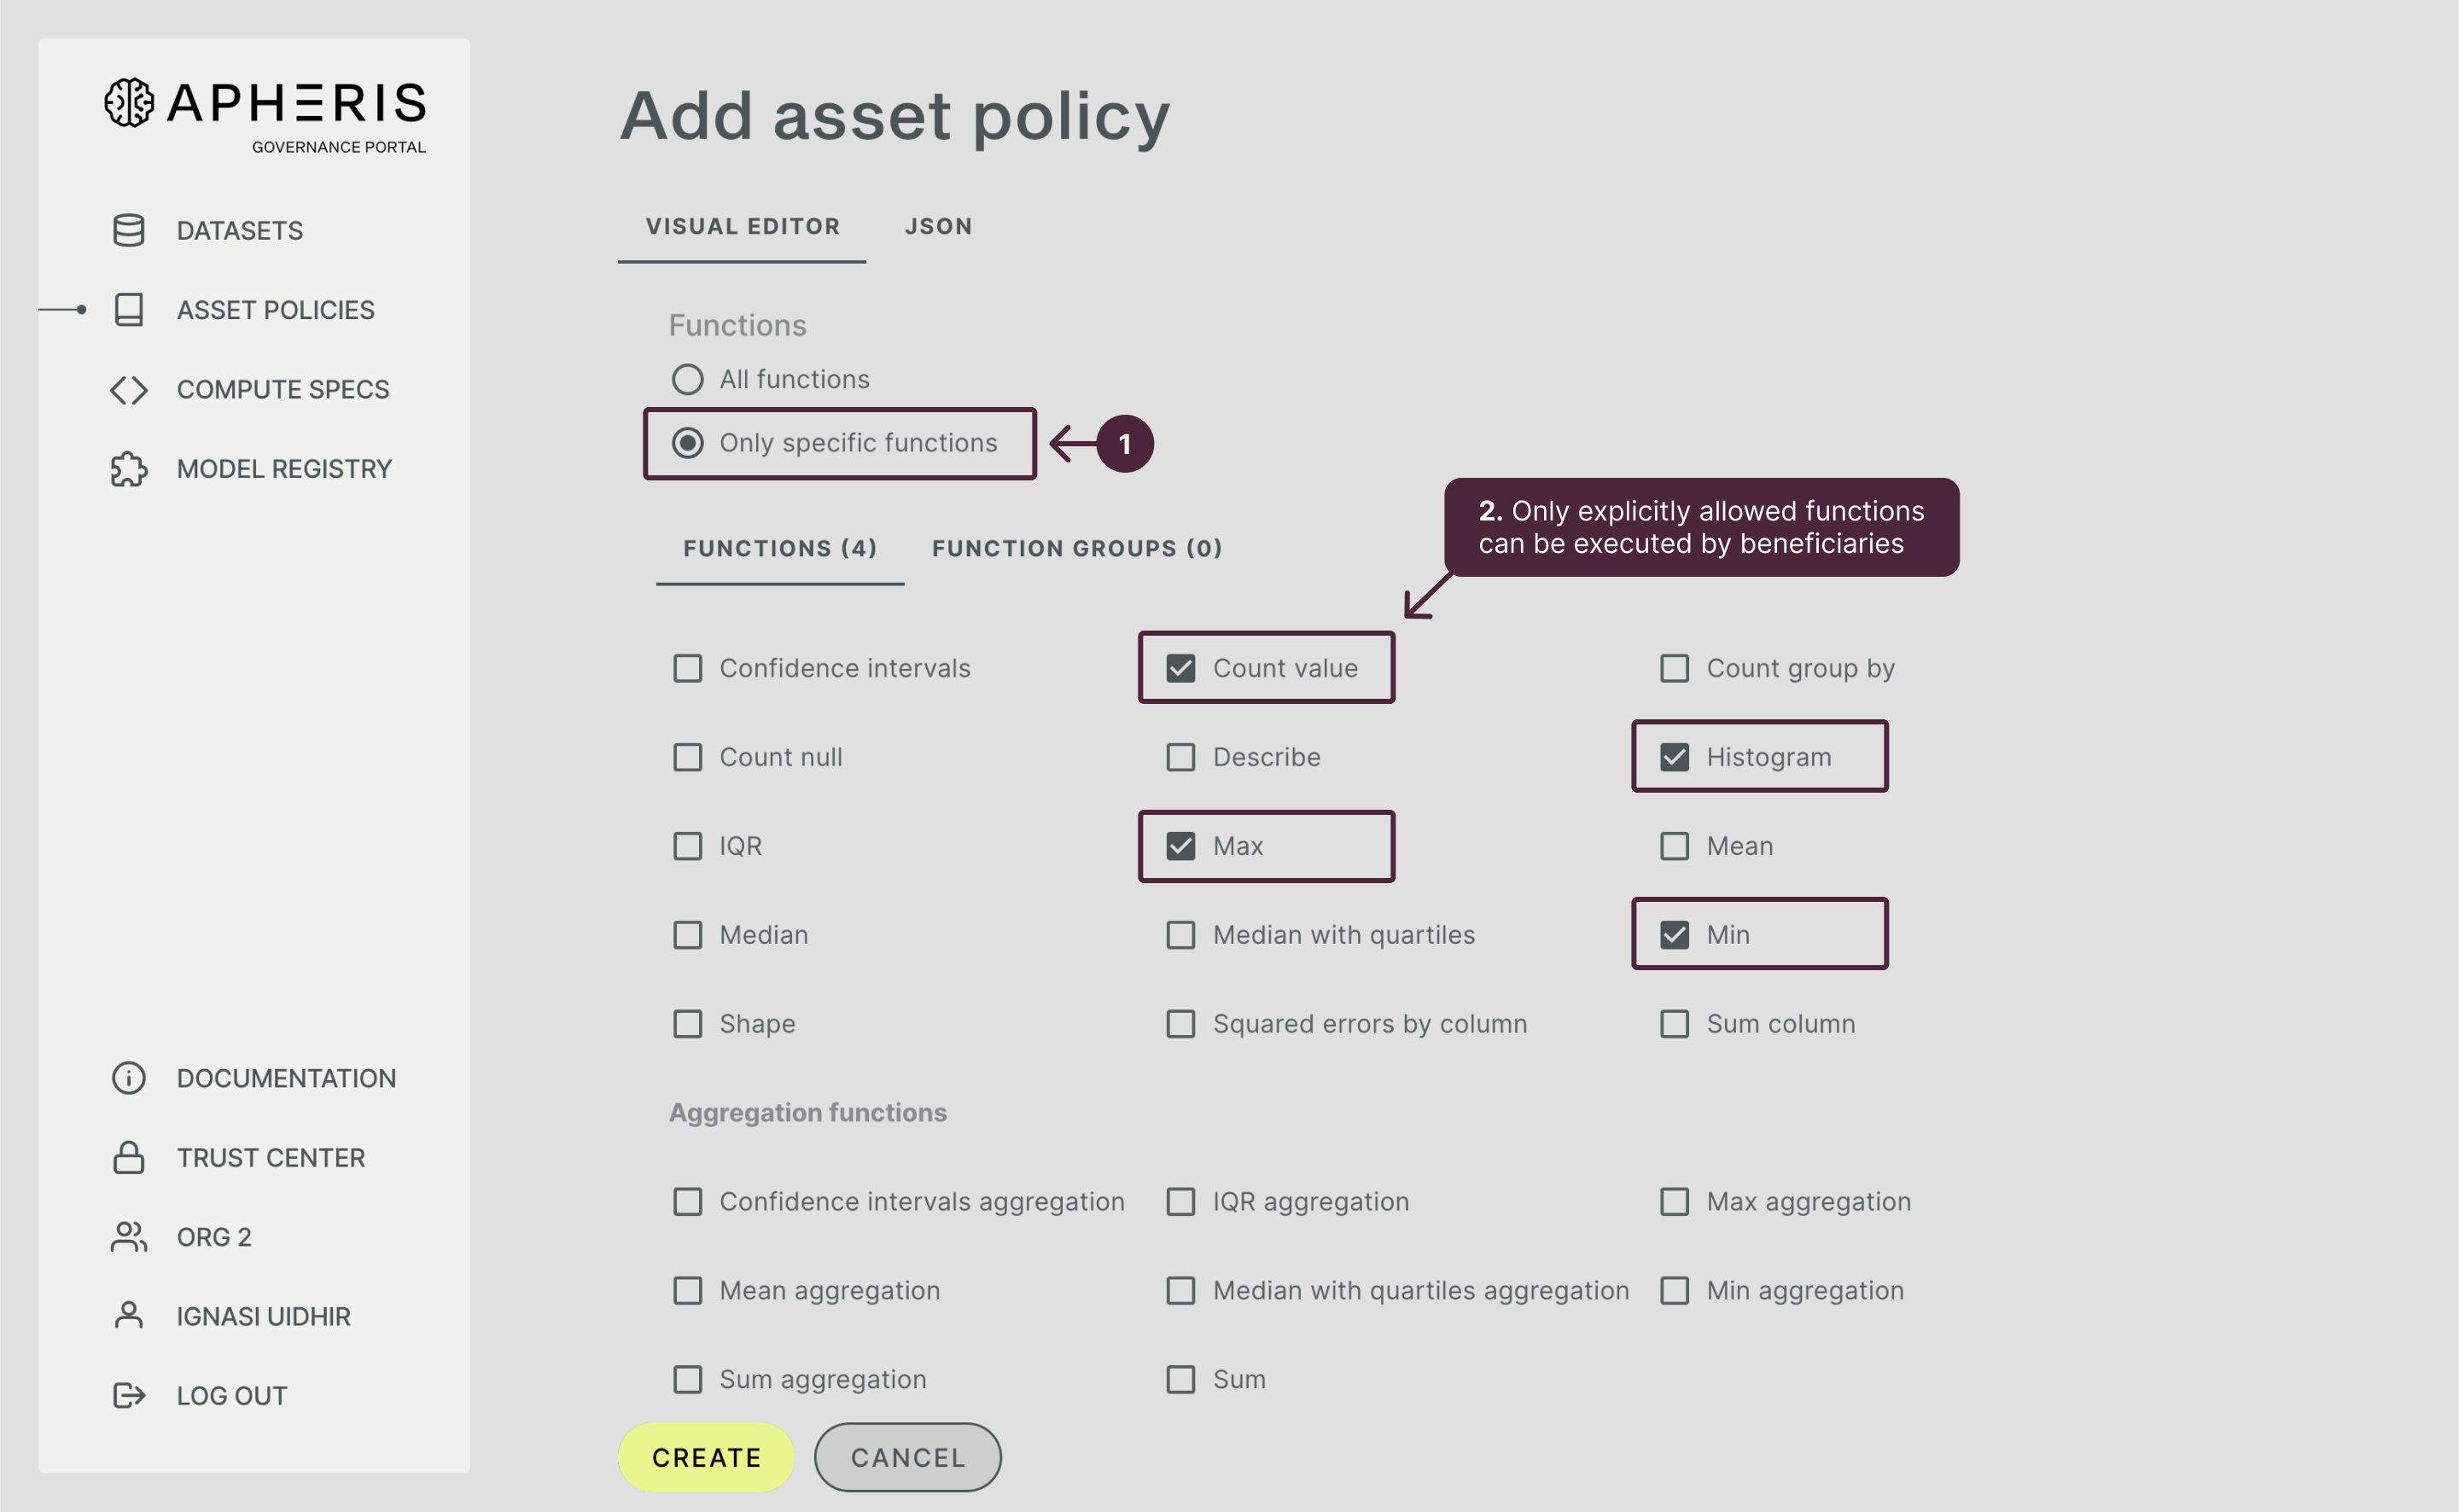
However, you only wish to allow our beneficiary to run specific statistical functions. In this case, you select “Only specific functions” and then select the functions you want to allow.
Selecting Privacy Controls🔗
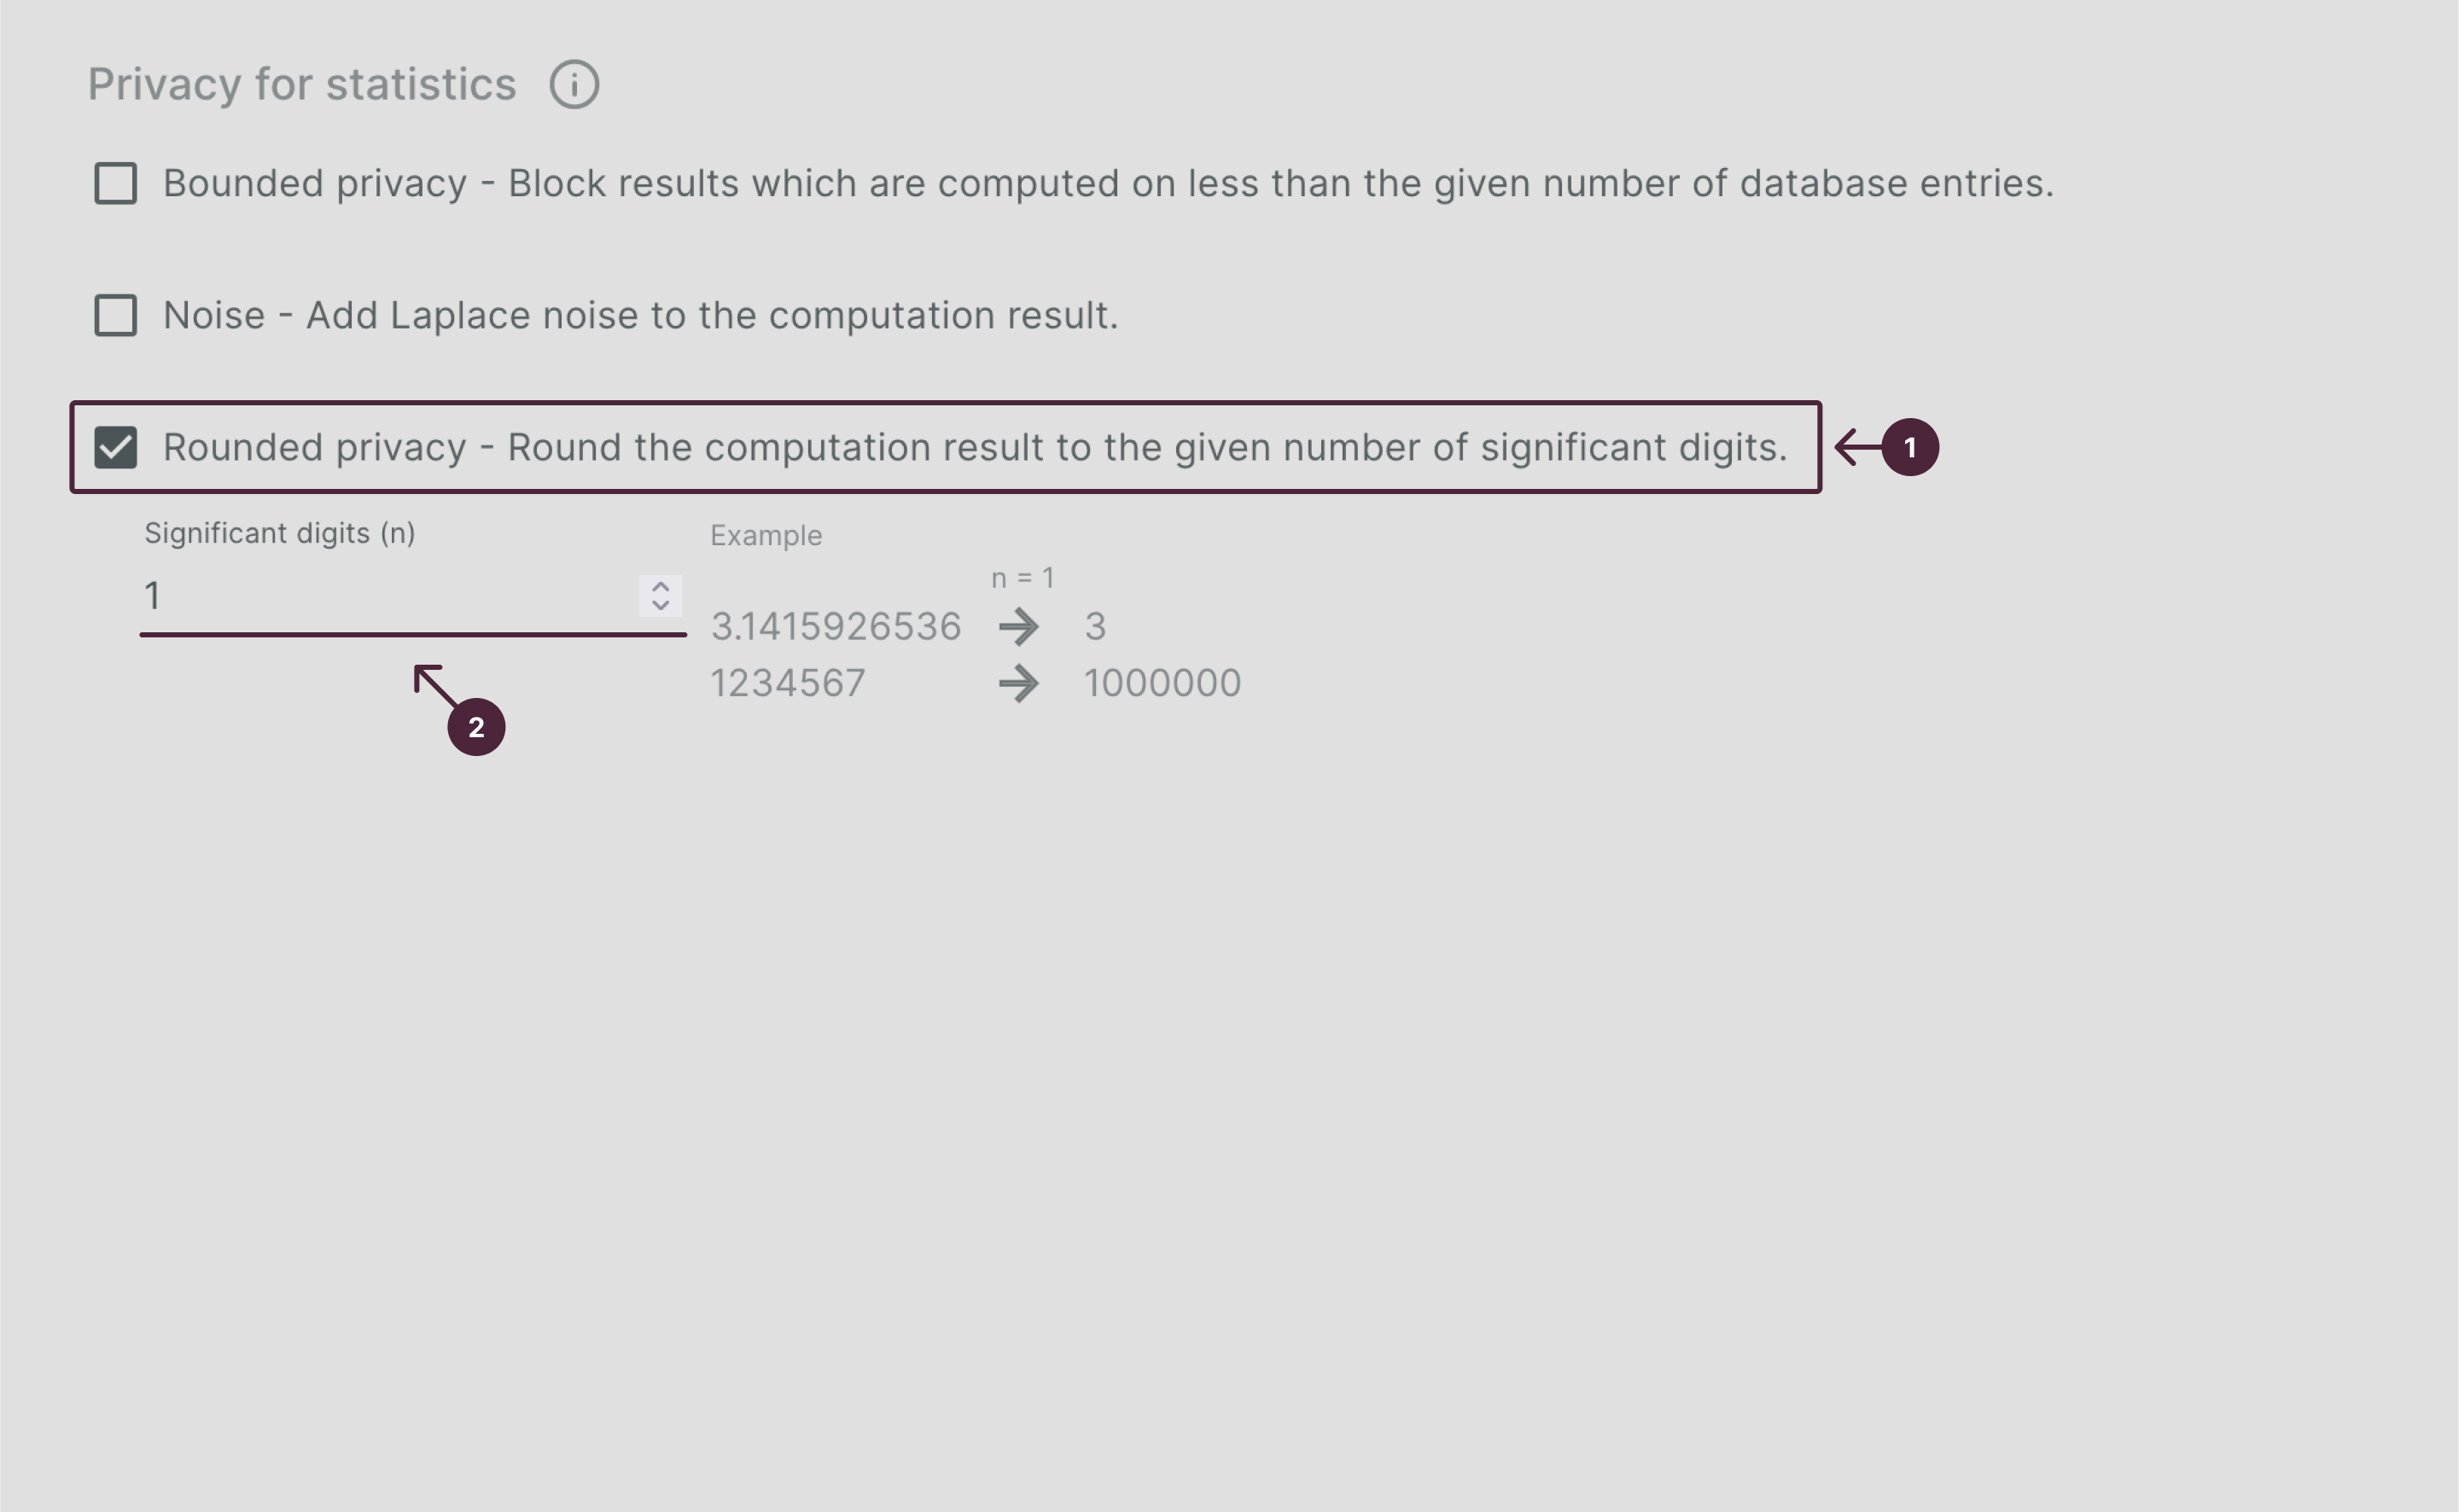
The Apheris Stats model comes with three different privacy controls which you can select and configure. When Data Scientists configure their Compute Spec, they have to set privacy controls to the parameters you defined in the asset policy. Apheris ensures that the computation is executed according to these specifications or rejected, if the computation is not in compliance defined parameters.
In this example, let’s say you would like to obfuscate the exact age of patients and select “Rounded Privacy”. We define '1' as the rounding target. You can see examples of how setting the parameter to '1' (or other settings) will affect the values, the computation will run on (see image below).
Click on “Create” and you should see the newly created asset policy in the asset policy list view.

Congratulations, your first asset policy is now active.