Manage users and permissions🔗
To create or manage users you need the role “Owner”.
Creating a new user🔗
A user is a person with a valid user account for the Apheris Computational Governance Solution. Each user belongs to one - and only one - organization.
To create a new user:
-
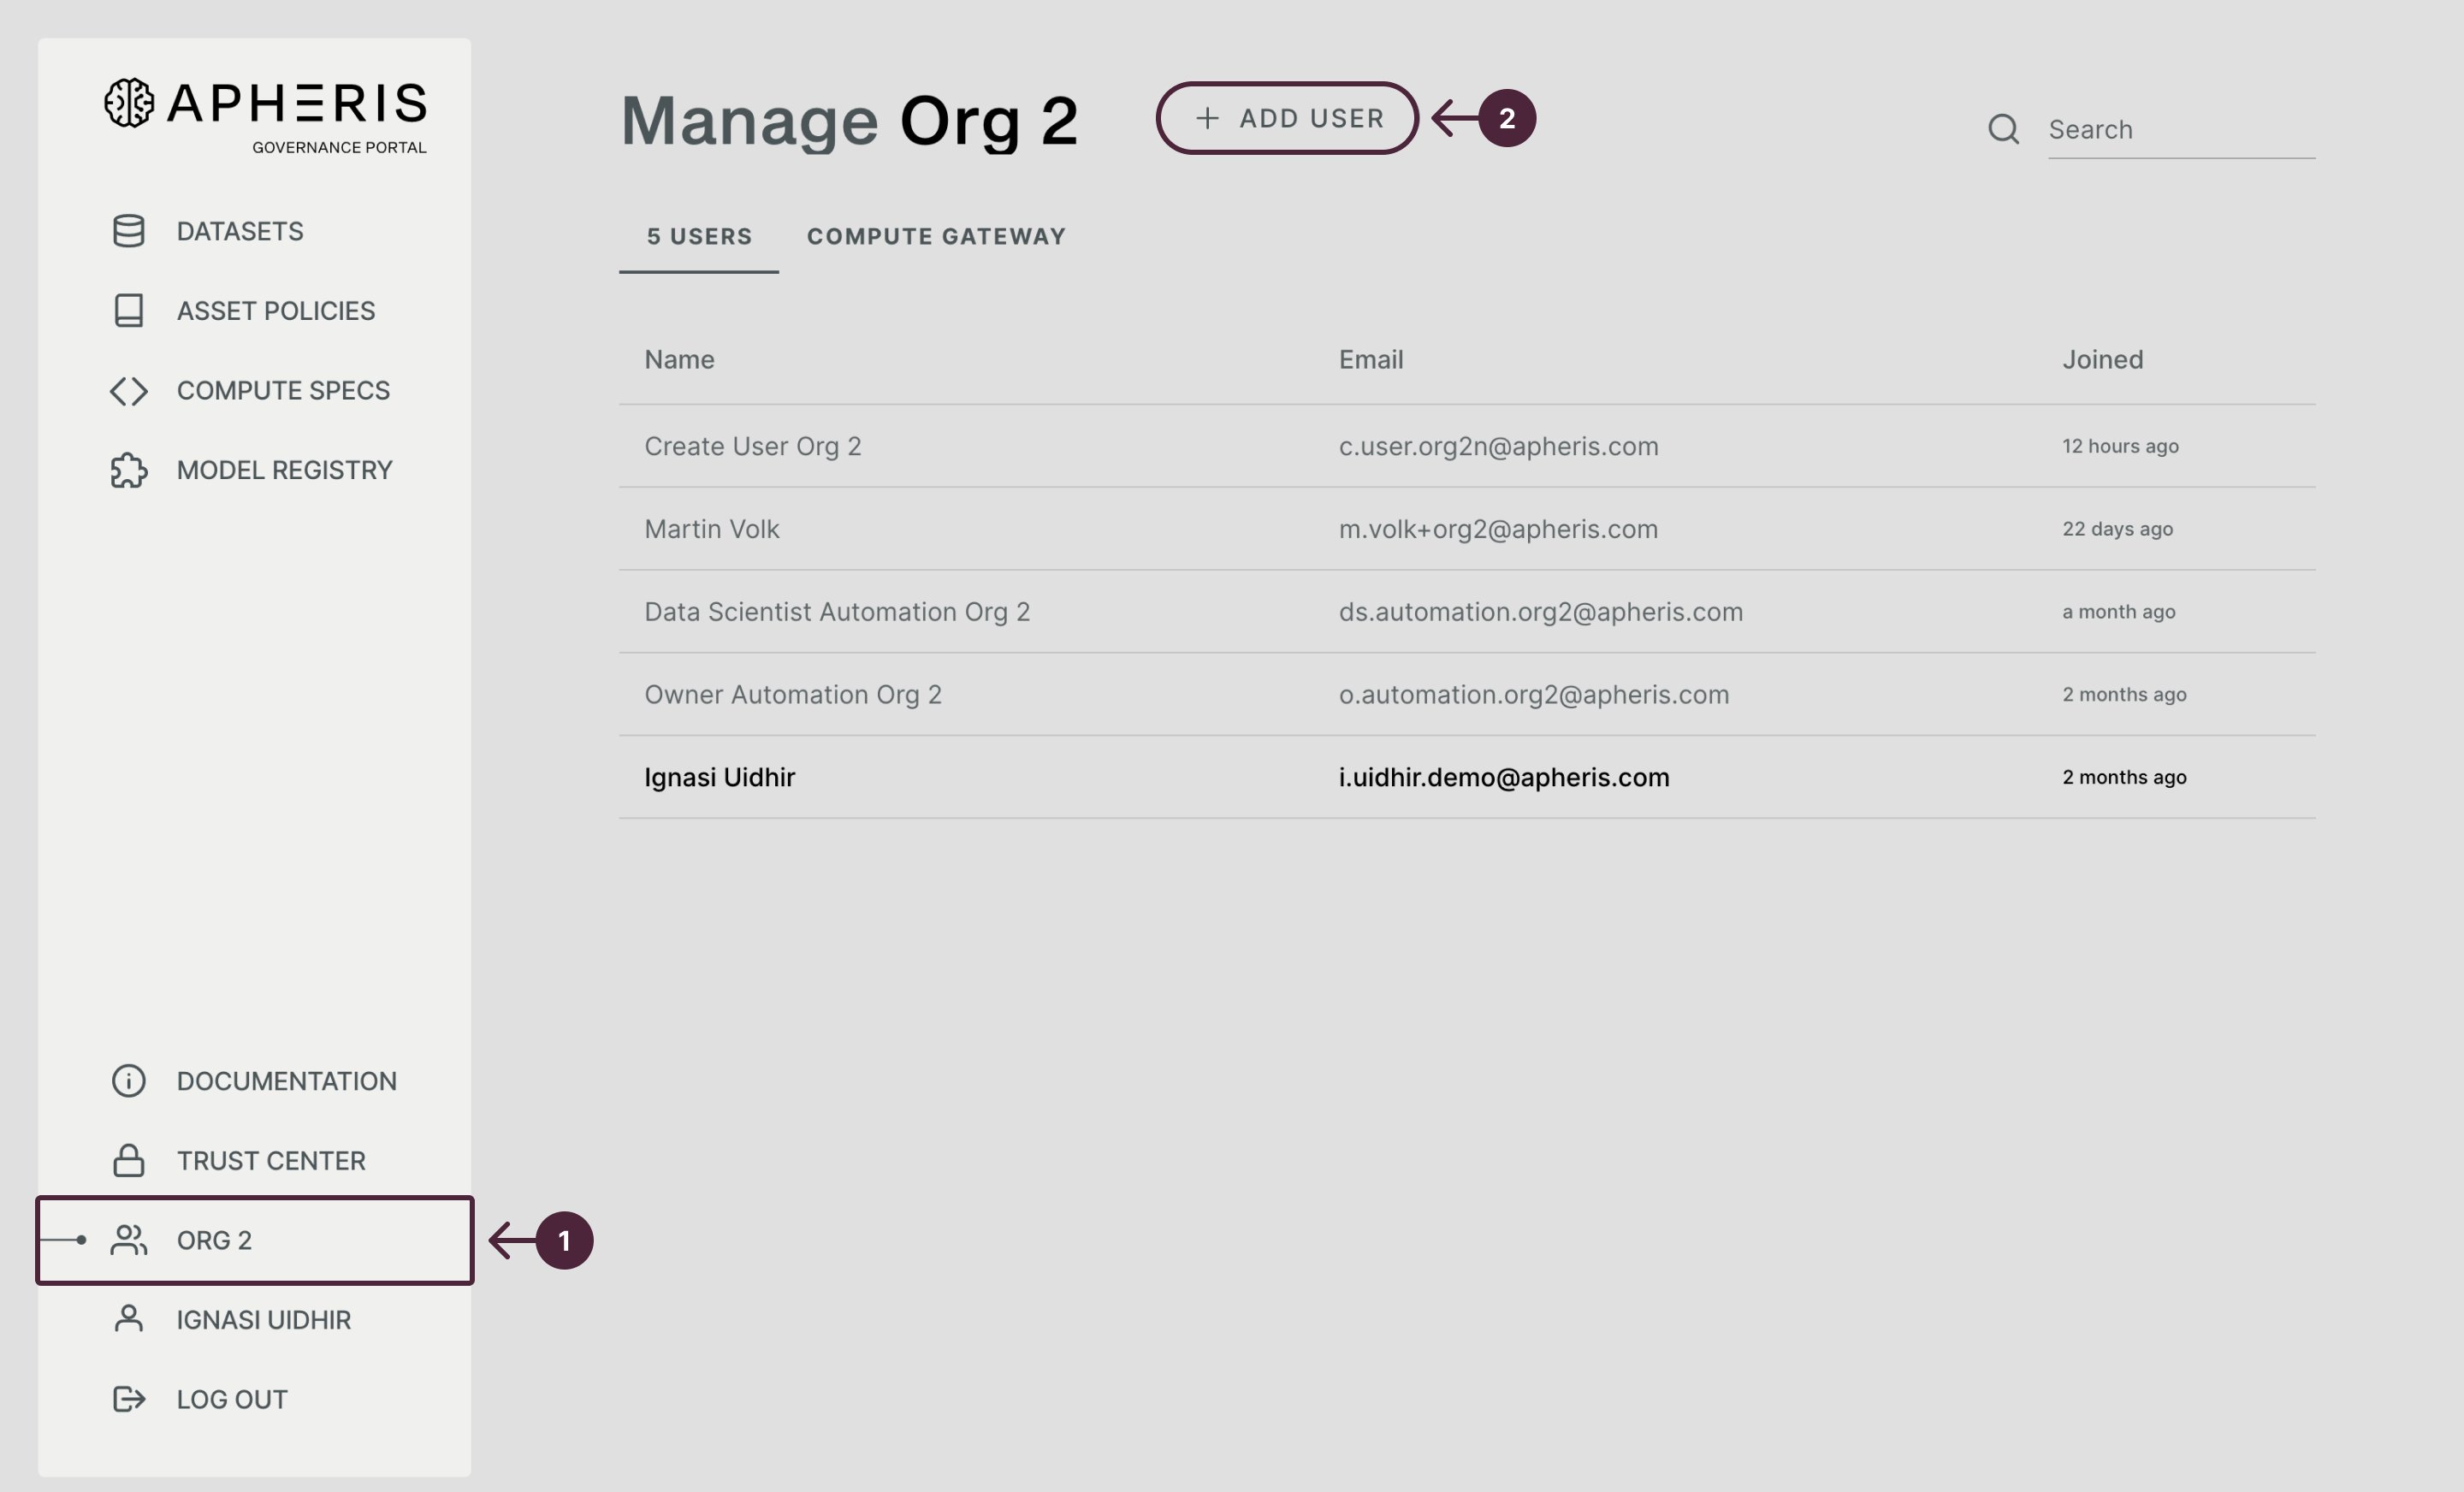
In the sidebar of the Governance Portal click the name of your organization to open the organization page.
-
On your organization page click Add user.
-
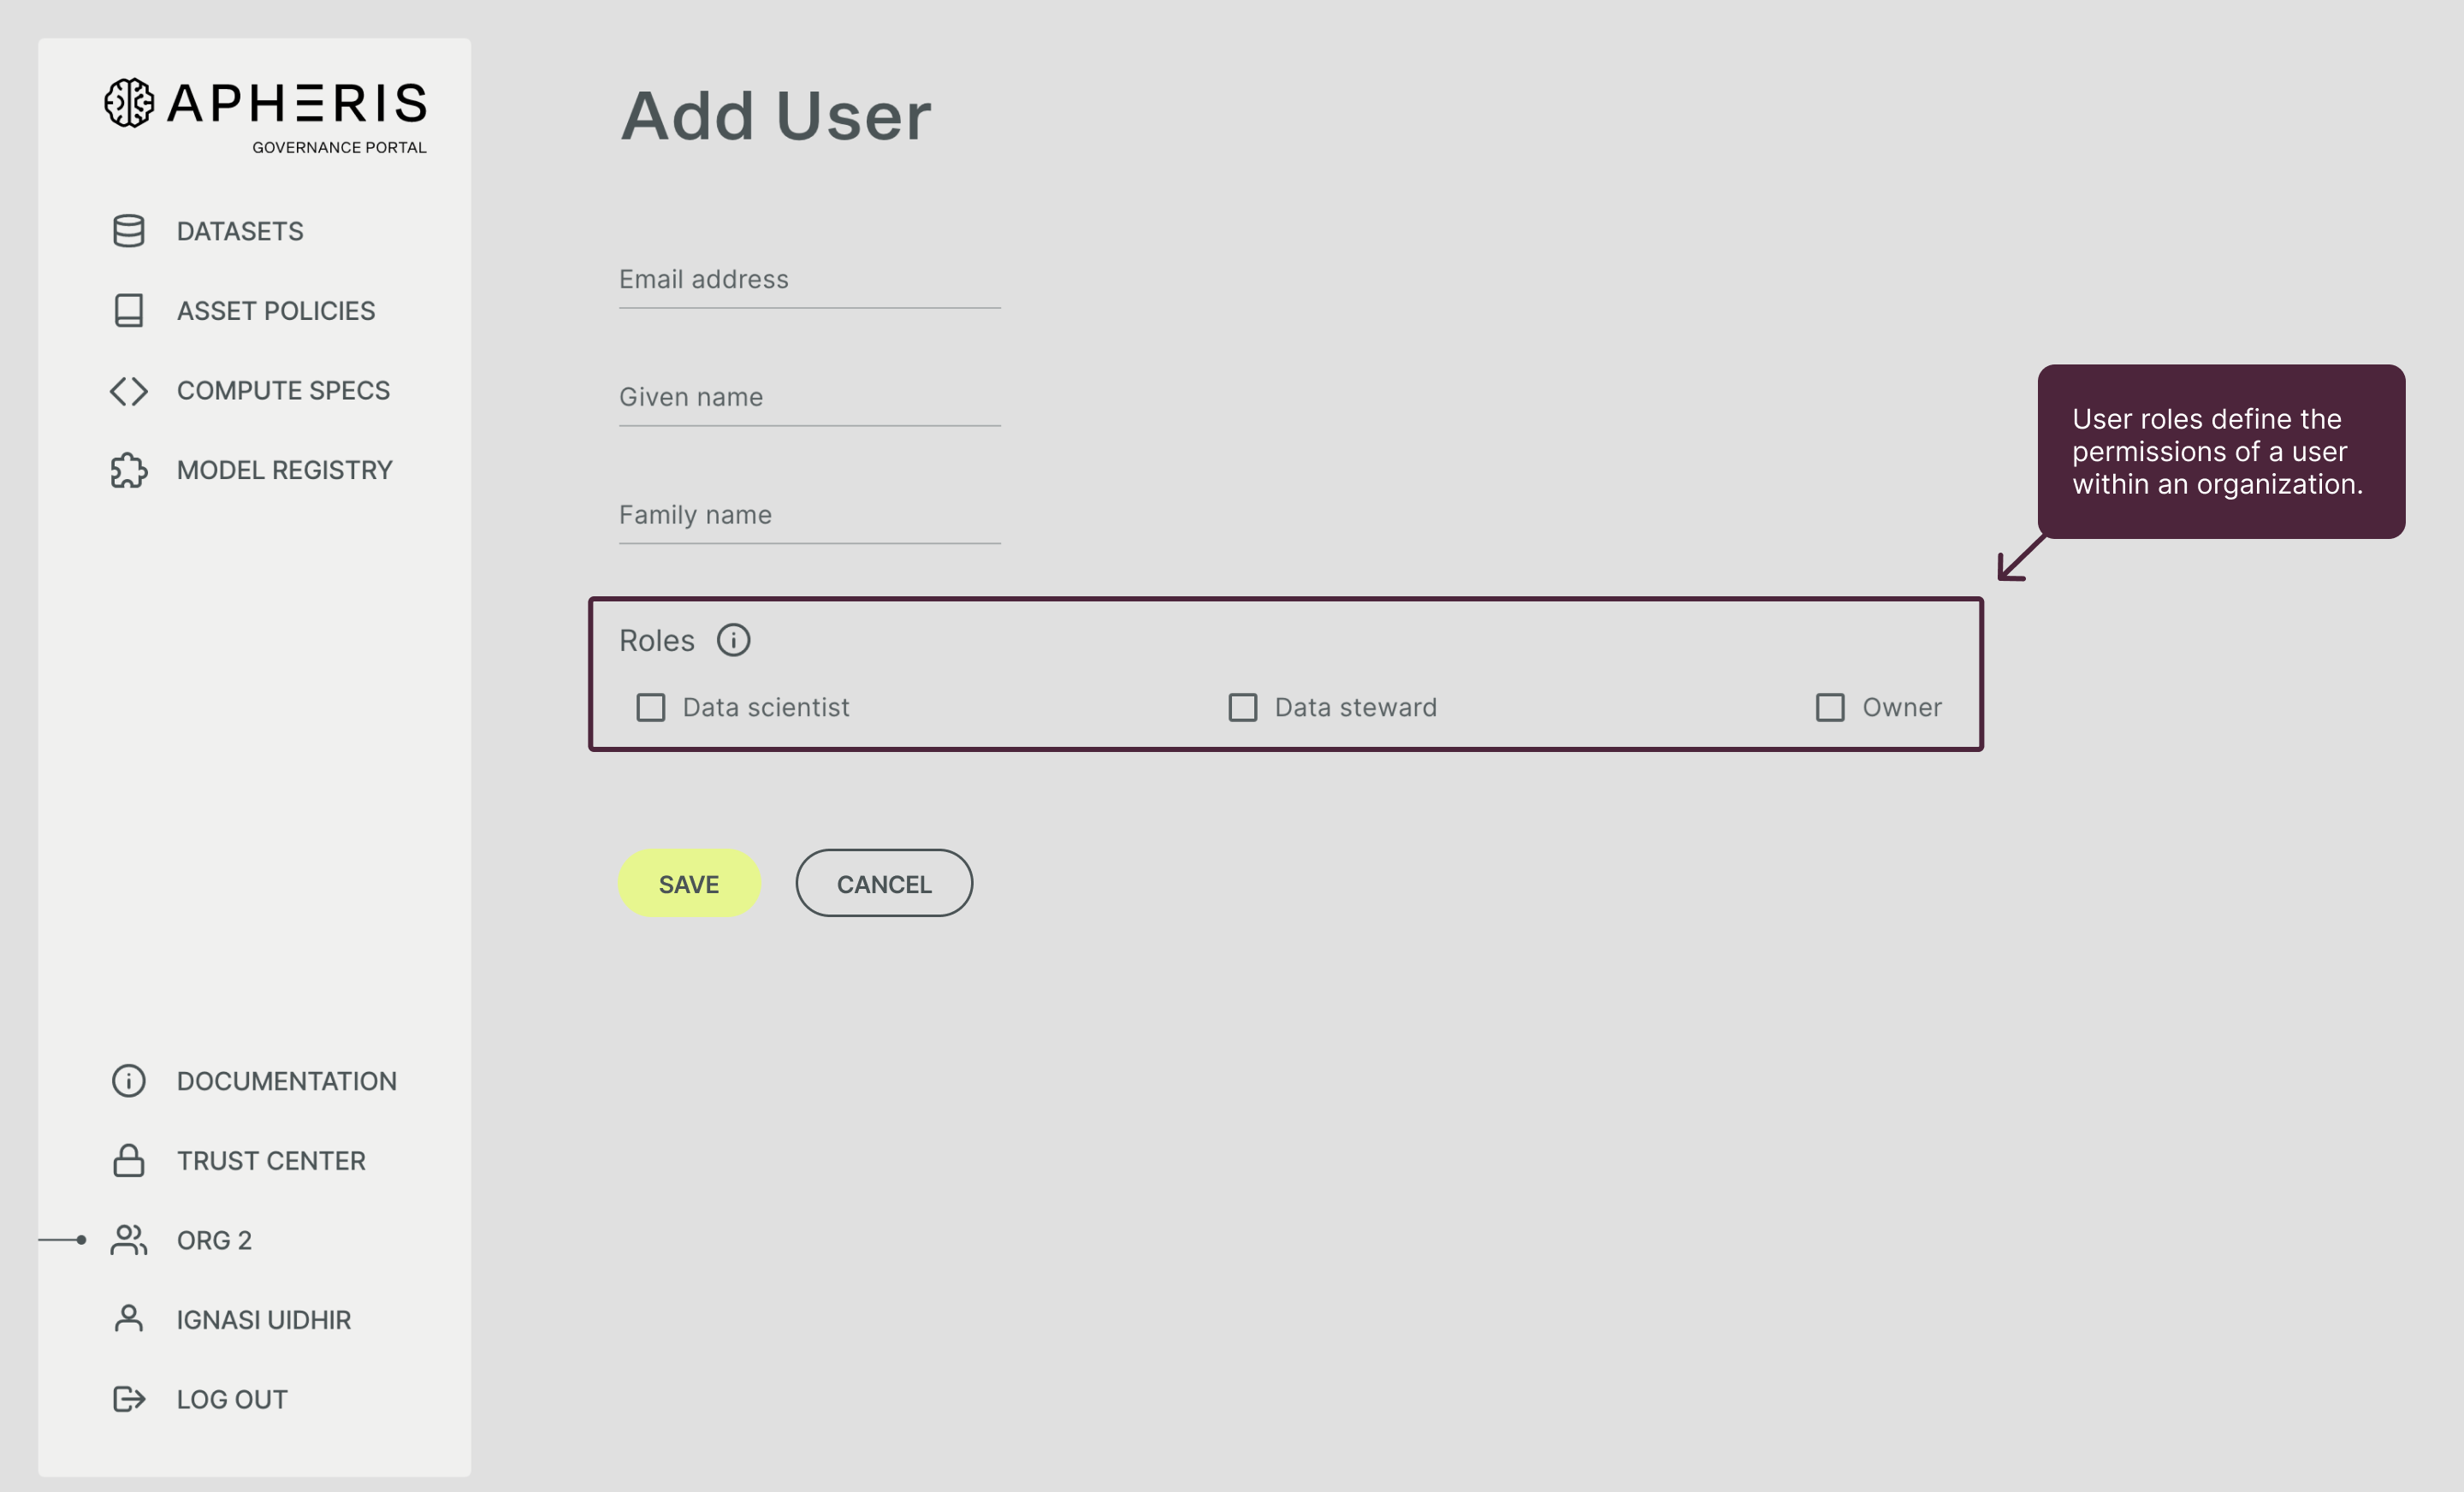
In the Add user dialog, enter the new user's email address and select a role
-
Select a role for the user. See Assigning roles below for details.
-
Click Add.
After clicking Add, the user will be added to your organization and an invitation email will be sent to the email address you provided. Please see Account setup and login for details.
Adding a user to an Apheris-managed organization:
When adding a user to an Apheris-managed organization, you have to provide first and last name as well as an email address. You also have to assign a role to the user. See Roles and permissions below for details.
Organization with Apheris managed users🔗
-
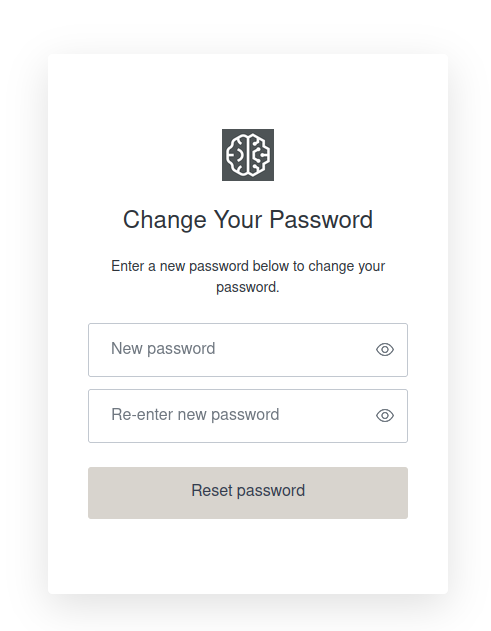
An invitation email is sent to the new user at the email address provided which includes a Change Password button.
-
After the user clicks the button in the email, the Apheris Web App opens for the new user to create a password and activate their account.
Organization with SSO enabled🔗
The identity management is done via your company's identity provider.
Assigning roles🔗
Role types🔗
You can assign one or more roles to a user to grant specific permissions. Apheris contains the following roles:
- Data Scientist: This user type can explore accessible datasets and run federated computations.
- Data Steward: This user type can add and manage datasets.
- Owner: This user type has full administrative access to the entire organization. An Owner can add, edit or delete users in the organization. Additionally, an Owner has all the rights of a Data Scientist and Data Steward.
- Model Manager: Can create new custom model versions.
Roles and permissions🔗
All user roles and permissions described in the table below are only valid within your own organization (intra-organization permissions). For cross-organization permissions (e.g. allowing computations on data), you create and configure asset policies.
Please note: The permissions for Data Steward and Data Scientist roles shown in the table below only apply for datasets they have access to. If users only have a Data Steward role assigned, then these users can only see datasets which they registered themselves or got granted access via an asset policy.
| Permissions | Owner | Data Steward | Data Scientist | Model Manager |
|---|---|---|---|---|
| Administration | ||||
| Create new user accounts | ✔️ | |||
| Assign roles to user accounts | ✔️ | |||
| Block user accounts | ✔️ | |||
| Operations | ||||
| Register datasets | ✔️ | ✔️ | ||
| Manage datasets | ✔️ | ✔️ (if registered by Data Steward) | ||
| View datasets | ✔️ | ✔️ (if registered by Data Steward) | ✔️ (if beneficiary) | |
| Create asset policies | ✔️ | |||
| Manage asset policies | ✔️ | |||
| Create and submit Compute Specs | ✔️ | ✔️ | ||
| View Compute Specs and their status | ✔️ | ✔️ (if it is own Compute Spec) | ||
| Review, approve/reject Compute Specs | ✔️ | |||
| Access Model Registry | ✔️ | ✔️ | ✔️ | |
| Create custom model versions | ✔️ |
In deploying our product, it is critical to rigorously apply the principle of least privilege across all access points. This entails granting users the minimum level of access necessary for them to perform their functions (i.e., Data Scientist, Data Steward, or Owner) effectively. Regular audits should be conducted to review and adjust access levels, ensuring they remain aligned with role changes and evolving needs.
Changing role of a user🔗
To change the role of a user:
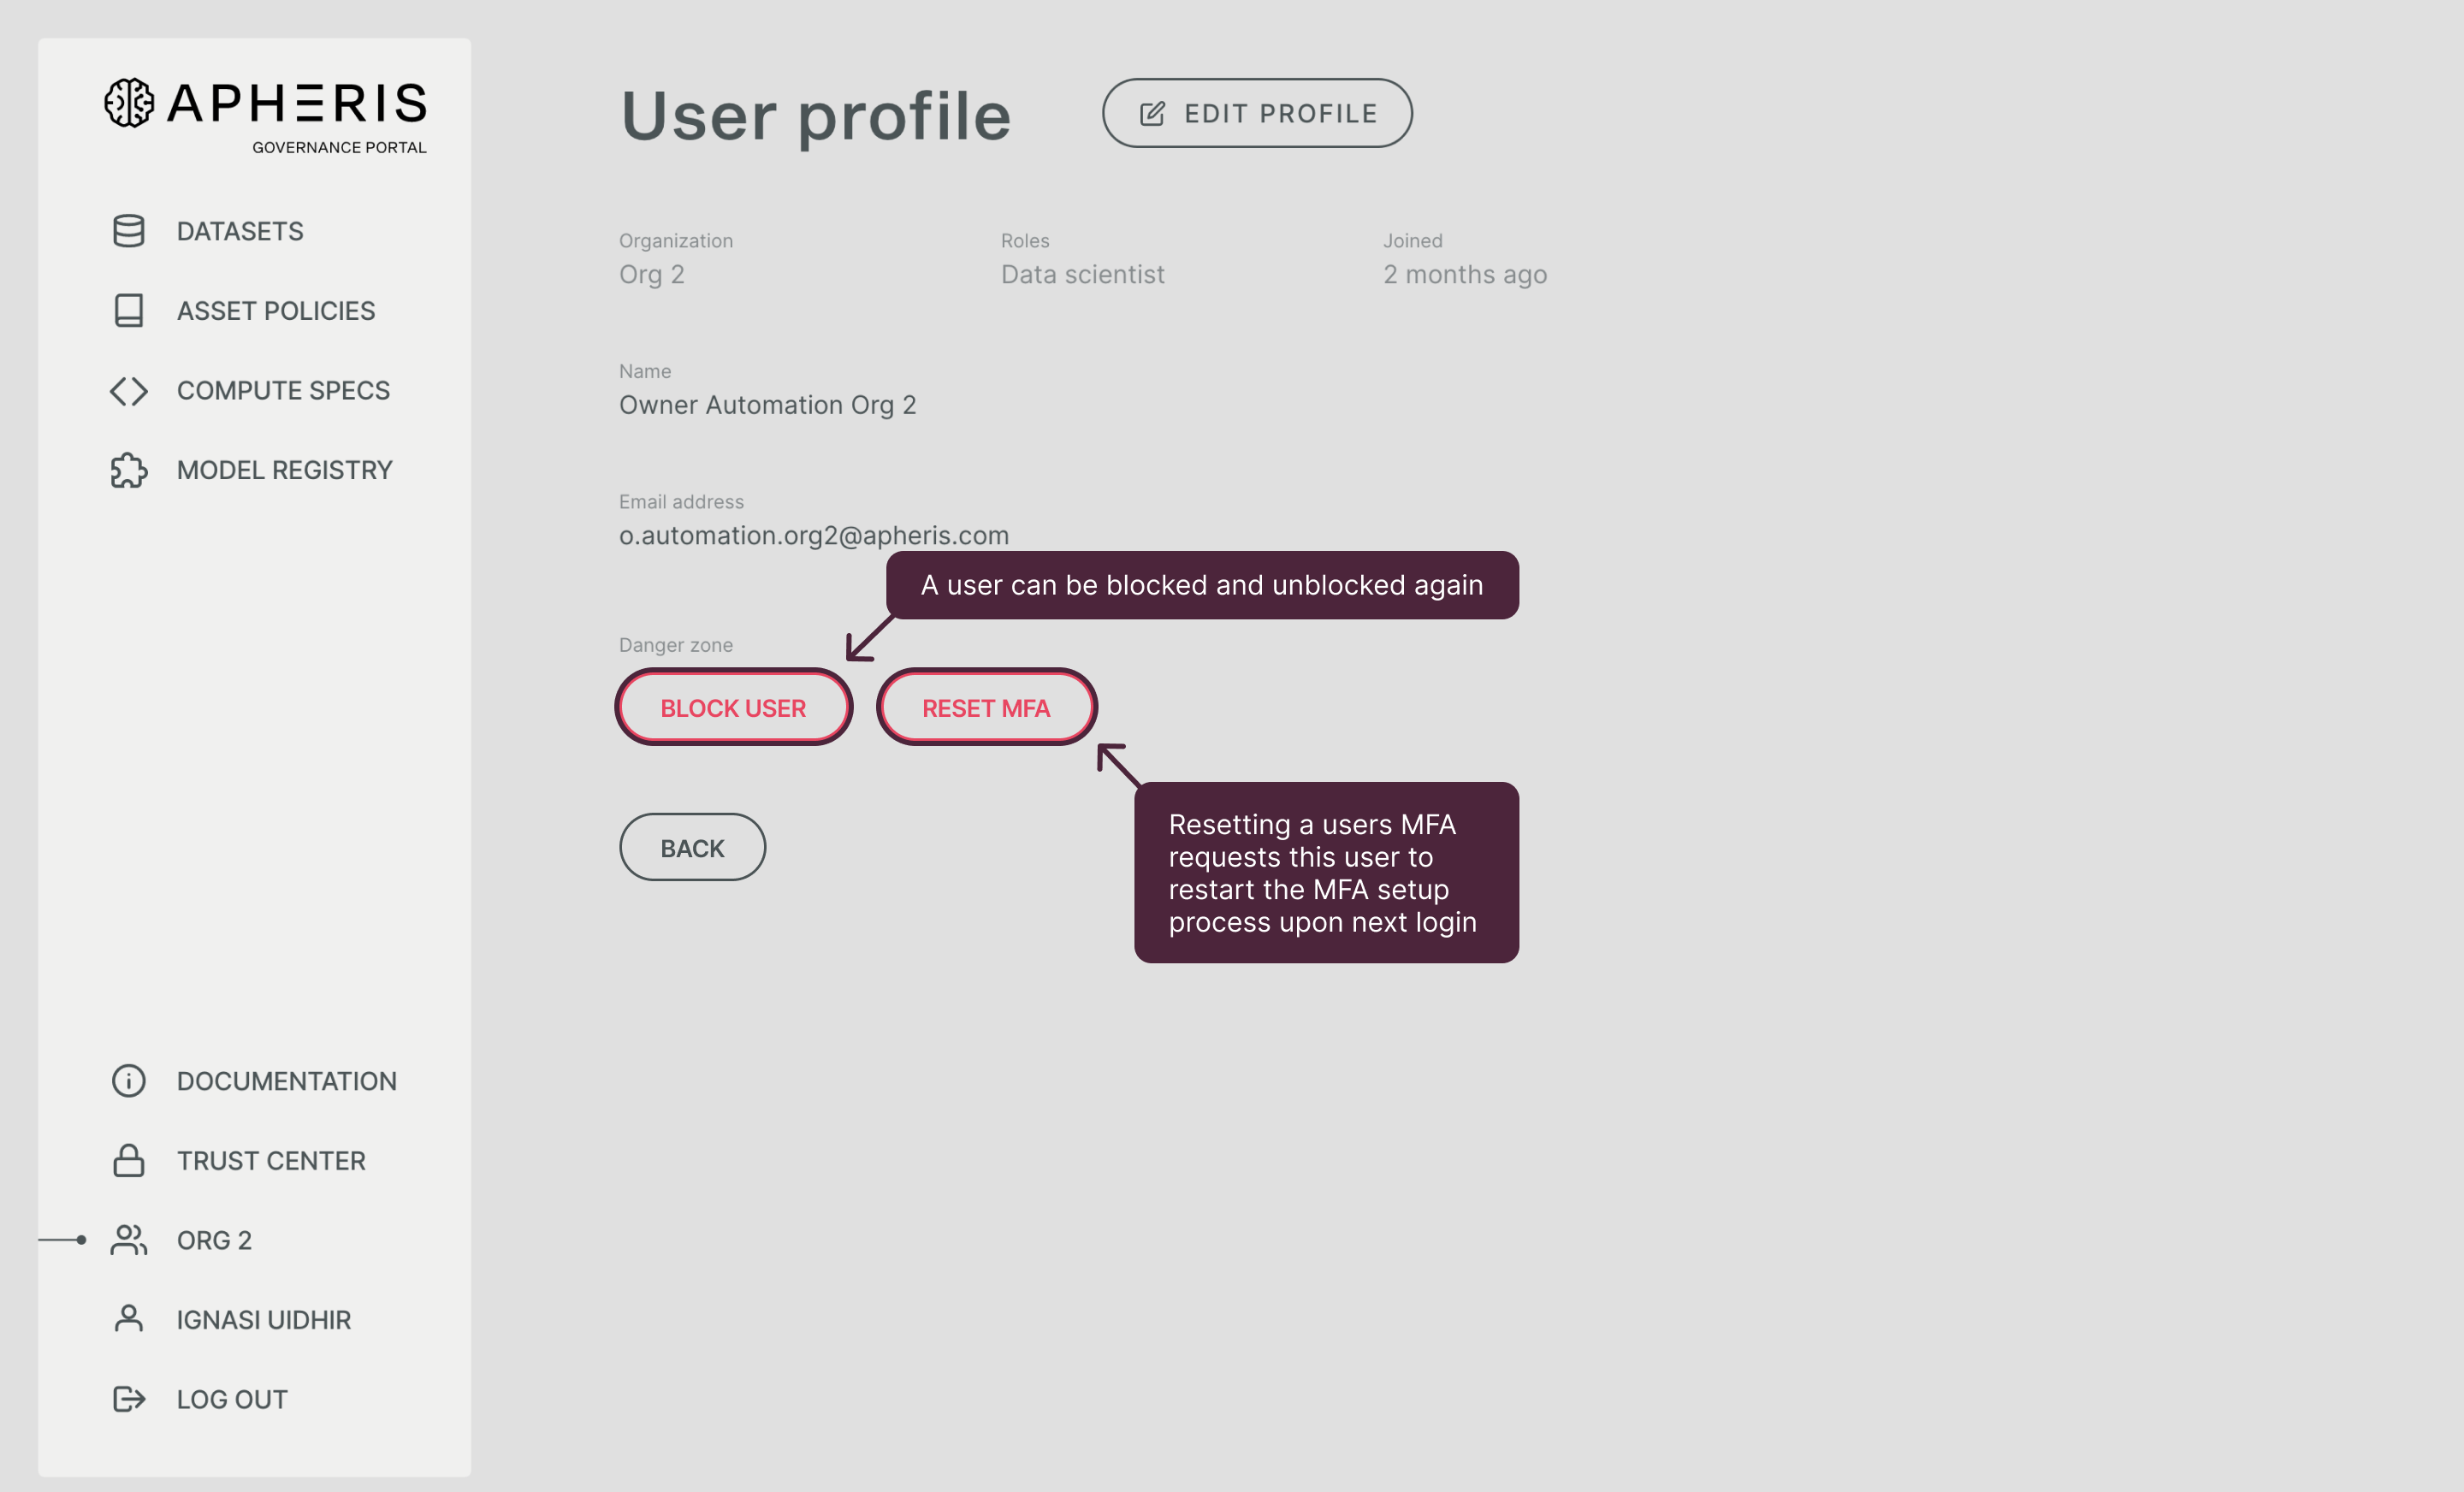
- From the organization page, click on the row of the user.
- Click Edit Profile on top of the user profile screen.
- On the Update page, select the new role for the user and click Save.
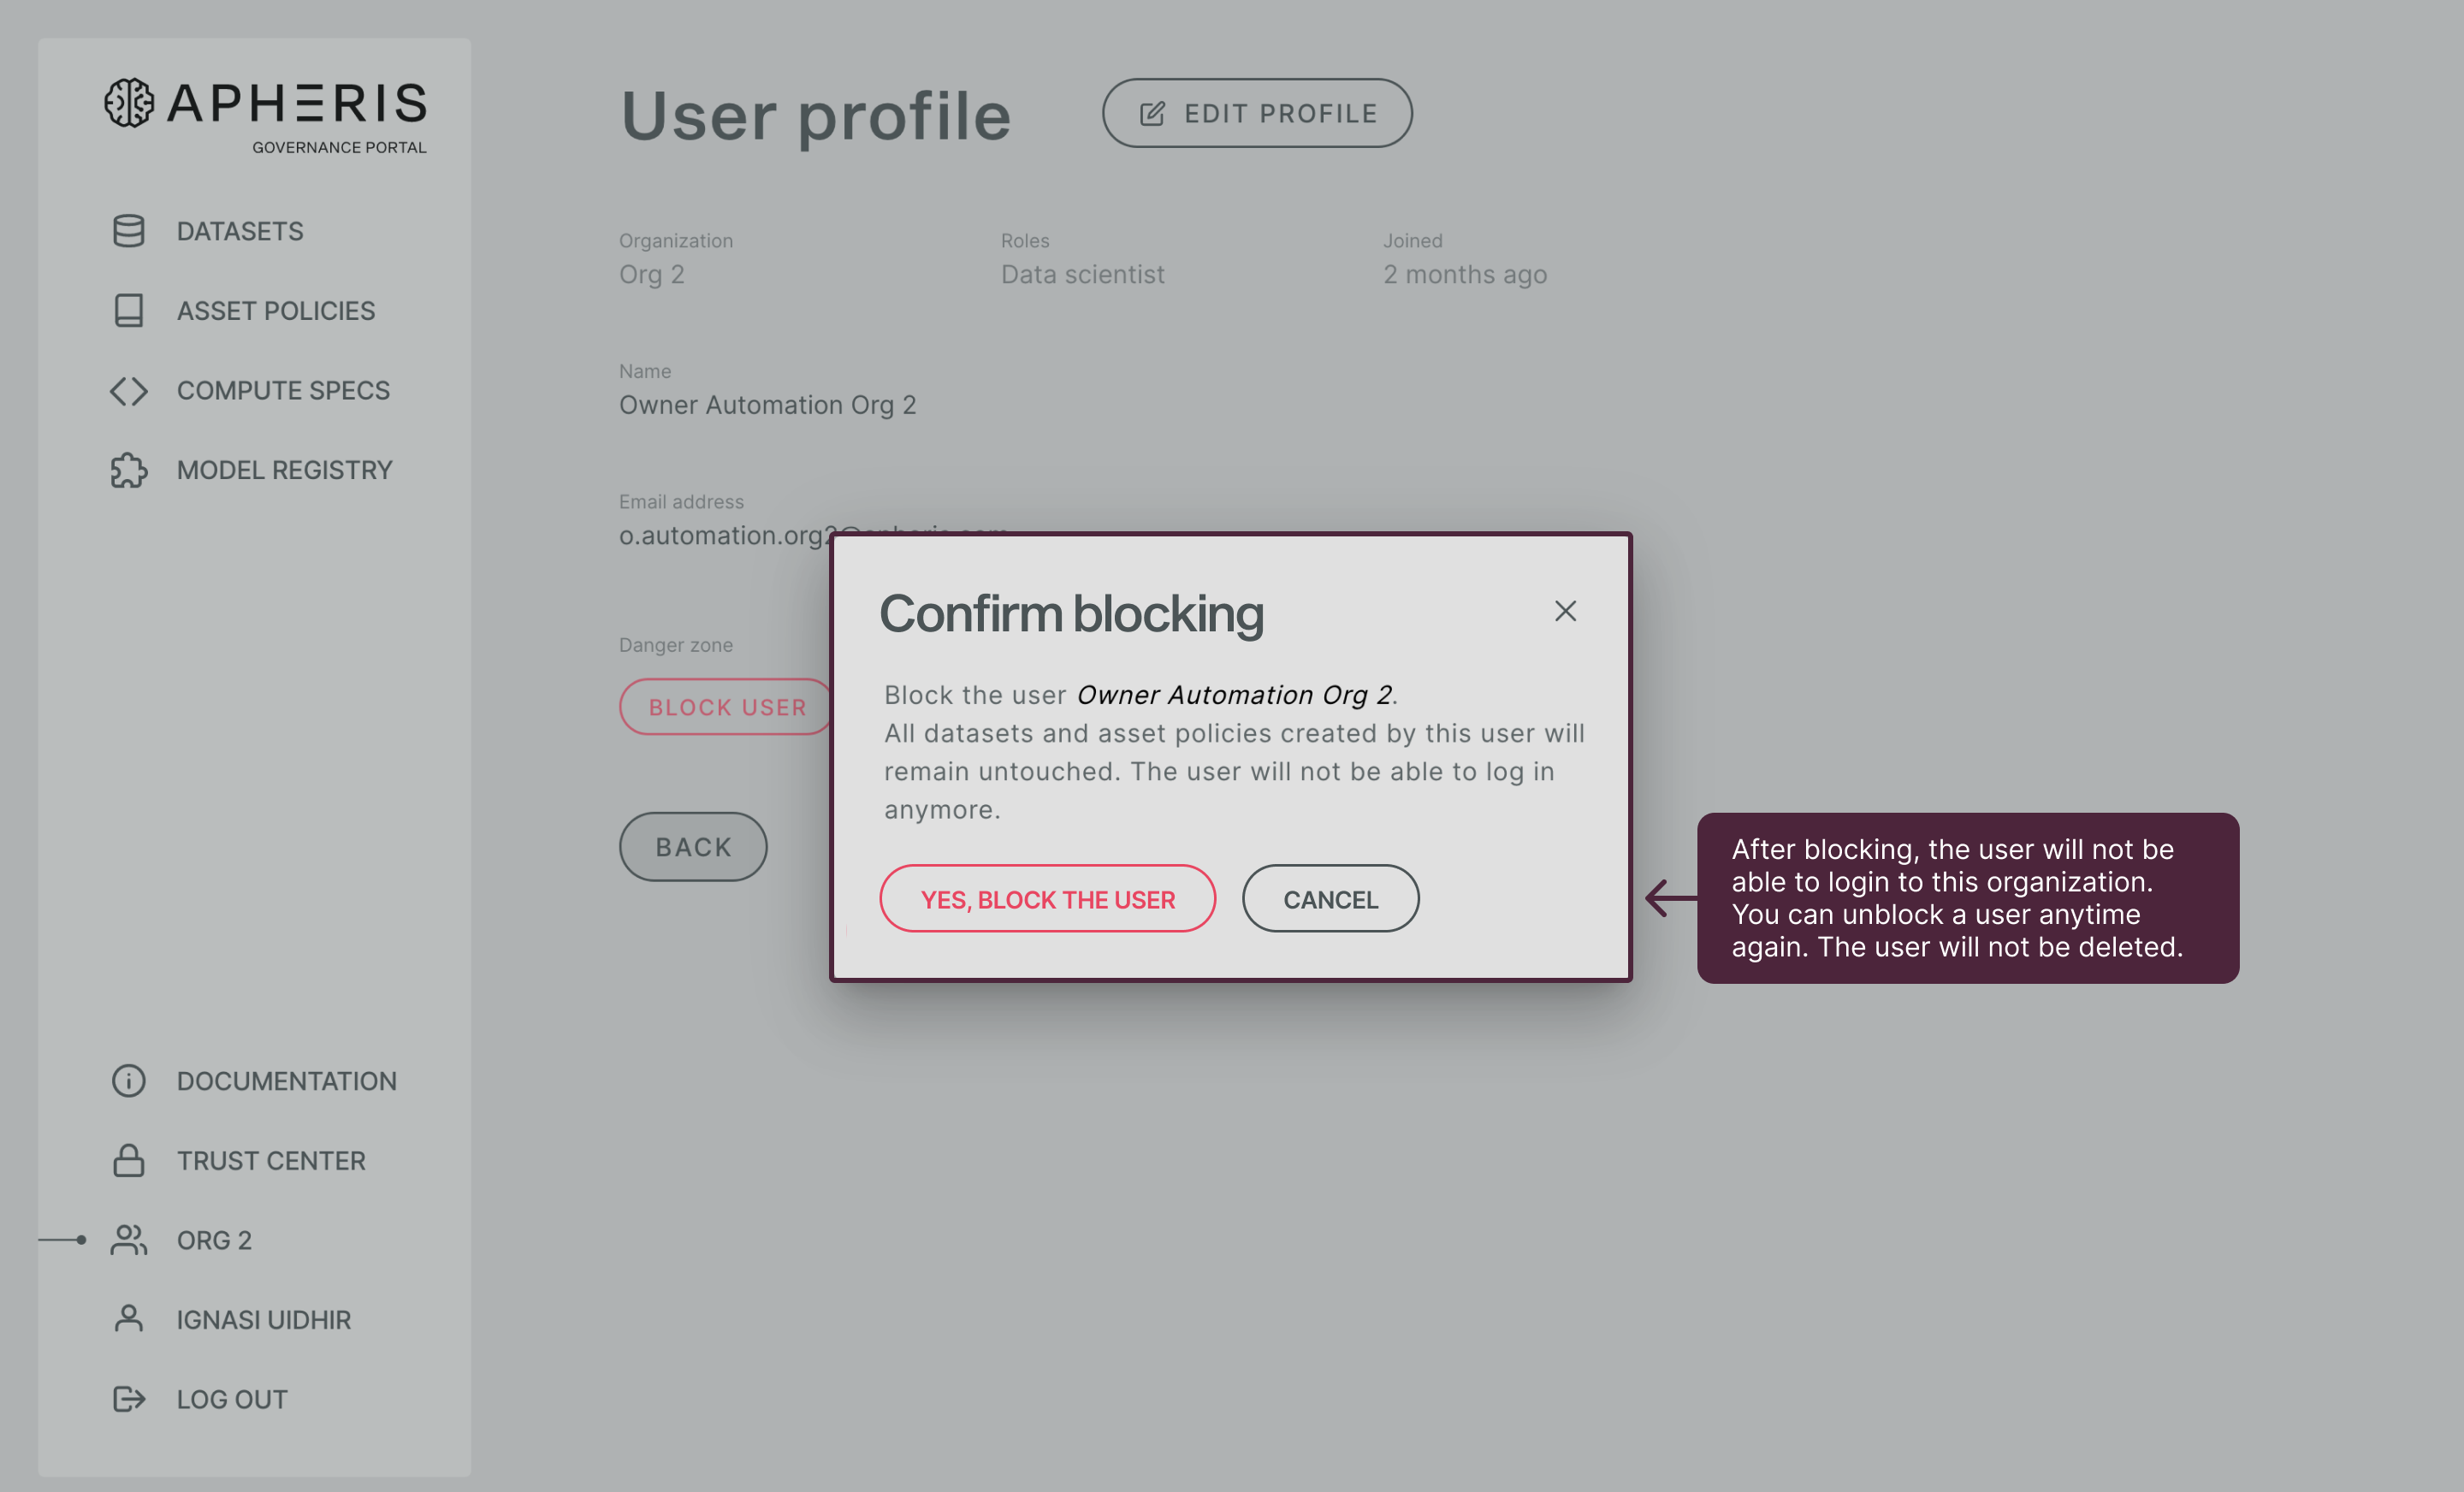
Blocking a user🔗
To block a user:
-
From the organization page, click on the row of the user.
-
Click on the Block User button
-
Confirm the blocking.
To un-block a user:
-
From the organization page, click on the row of the user.
-
Click on the Unblock User button
-
Confirm the unblocking.
Enforcing Multi-Factor Authentication (MFA) for your organization🔗
Organization with Apheris-managed user accounts🔗
MFA is activated per default by Apheris upon creation of your organization.
Organization with SSO enabled🔗
MFA is controlled and mandated by your SSO identity provider.